
R-BRT
Dev Log 03: Creating a Moving Texture with Shader Graph
Hello everyone! Colby here with Caffeine Rush, today I am going to be explaining my process of creating an animated texture using Unity's built-in Shader Graph tool. I will briefly go over my modeling and UV'ing process, along with a thorough explanation of how I create the textures using Photoshop, Substance Painter, and Shader Graphs.
Inspiration
While searching for reference photos of hospital hallways, I came across an image with this beautifully subtle birch forest wallpaper. This wall paper turned out to be an art installation, created by the Jason Bruges Studio, titled Nature Trail.
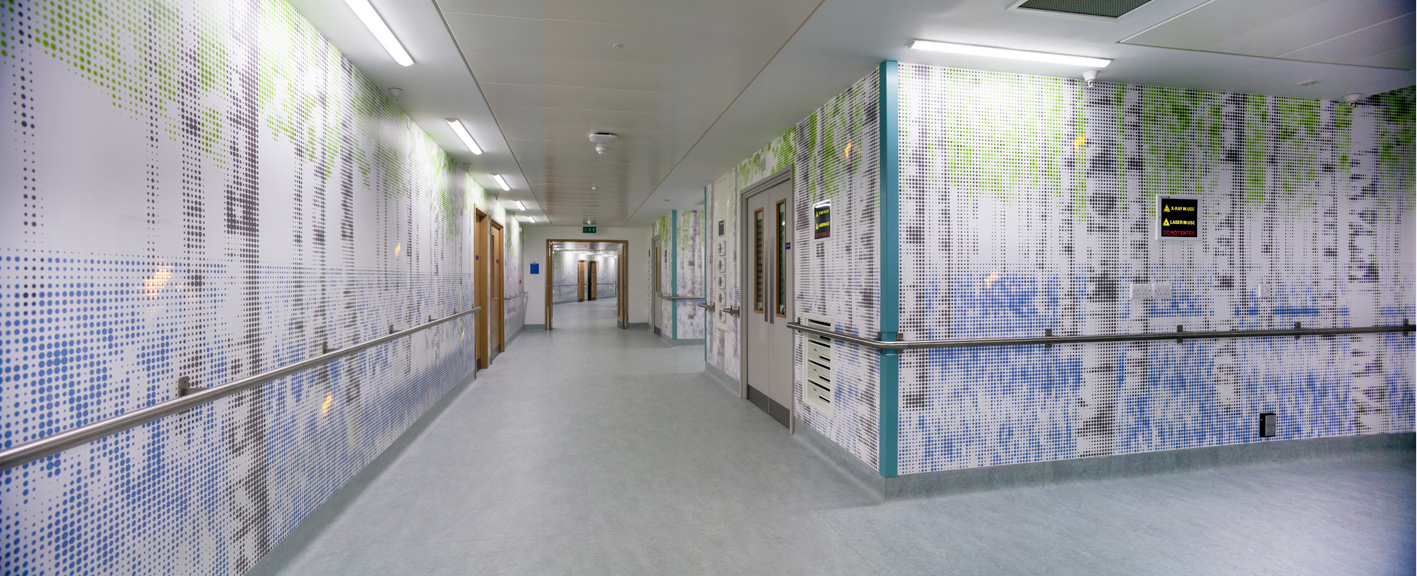
When I first discovered this image, it inspired me to want to create a digital wall piece for our game R-BRT. Seeing the somewhat dithered, polka-dot pattern reminded me of an electronic screen. The Nature Trail actually incorporates an electronic screen behind the forest wallpaper, which shines through the wallpaper and displays a variety of animals traversing the forest. I will not be recreating this art installation for our game, instead, I want to create a forest that slowly moves across the screen, along with leaves that rustle in the wind.
Initial Steps
To create the effect I want, I like to first break down the steps I will need to take.
- Create a Wall Model.
- Create the Forest Artwork, with different layers for the leaves and trees, along with making sure the artwork tiles from left to right.
- UV the wall model to fit the Forest Artwork.
- Texture the parts of the Wall Model that will not be touched in the Shader Graph.
- Create the Shader Graph.
Creating the Model
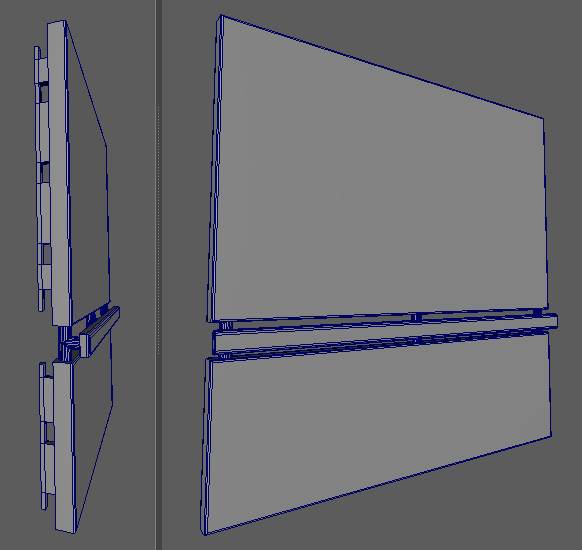
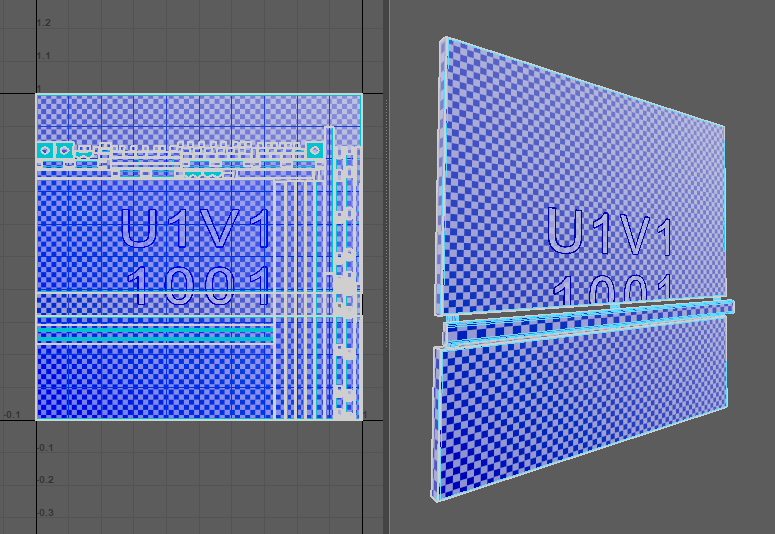
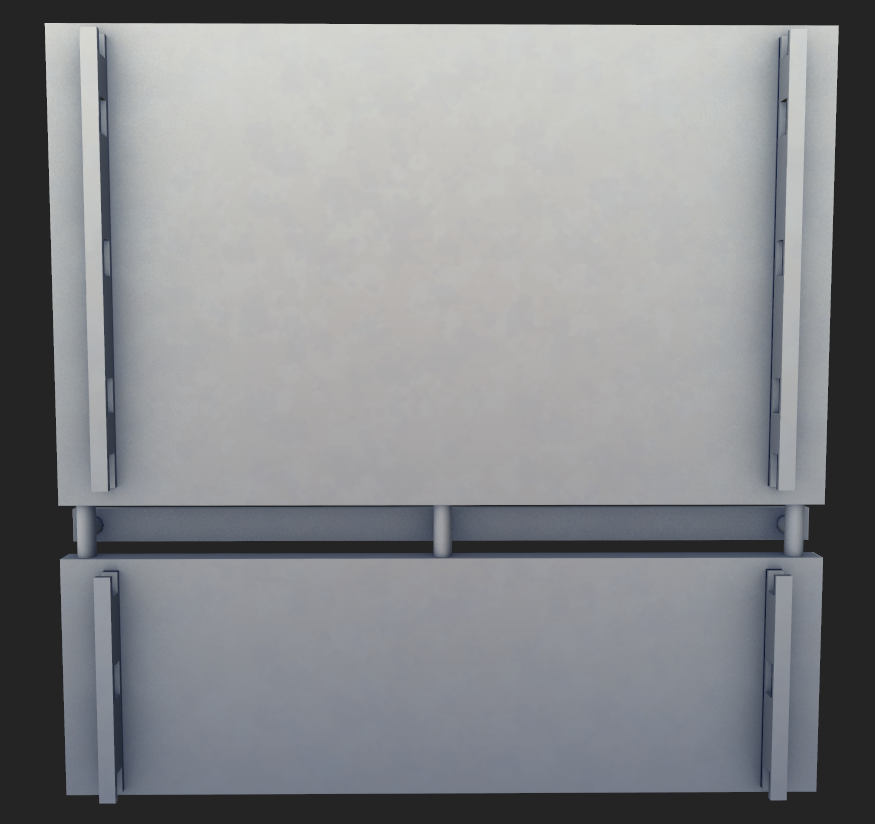
To start, I created a cube and set the dimensions roughly to the scale of the hallways I previously had modeled. I decided to keep the face of the cube where the electronic board would be square. The reason for this is that I knew the forest drawing would also be square, which will allow the texture to scroll across multiple walls.
Here is the final model along with its UV's.
Creating the Forest Artwork
The Forest Artwork I have created will be fairly simple, as most of the details will be lost in the Shader Graph. The key point to take away from my drawing is that I kept parts of the drawing in separate layers. I created a layer for the background trees, foreground trees, and the leaves. The background and foreground trees will be scrolling at different speeds to create a sense of depth, while the leaves will be chipped away at using noise in Unity's Shader Graph.
Here is a Gif showcasing the different layers of the drawing.
Static Texturing
Setup
Texturing the static parts of the electronic wall is fairly straight forward. To start, I have separated the part of the wall that will receive the Shader Graph material from the part that will not have the Shader Graph Material. This will allow me to bake the mesh maps for the entire wall, receiving the correct amount of AO (Ambient Occlusion), while also letting me export only the static material of the wall.
Texturing
For this project in particular, we are aiming for Stylized textures. At the start of the creation of R-BRT, I created a base Stylized material that I could then use for all future assets of this project. This material includes a multitude of layers, with the main layers being an AO layer that adds a tinge of blue to the shadows, along with some simple noise that adds some texture over the whole model. This is what the Electronic Wall looks like with the initial parameters of the Stylized smart material.
The static parts of this wall will mostly be made of metal, but for R-BRT, we have been trying to avoid using the built in parameters of a PBR material, such as metallic and roughness. This means we have to create a metallic look using only the Albedo and Normal or Height map information. To simulate metal, I used a Curvature Generator, along with a Blur Slope filter to apply a lighter gray color along the edges of the handrail. This creates a used feel to the wall, along with adding some much-needed texture, since most of the static materials will be colored flat. The backside of the wall I will leave as a dark gray or black since it will not be seen for the most part. I've also added some simple normal-map indents to the sides of the wall, as I find that indents that simulate screws or bolts sell the idea of the model being made of metal.
Here is the static material, fairly simple right? I could have added some normal map details to the handrail itself, but too much detail in a small area, such as the handrail, would take away from the main focal point, that being the moving birch forest.

Shader Graph
Scrolling Texture
We've finally reached the part where we make the shader graph. To create a scrolling texture using Shader Graph, it is very easy. All you would need to do is plug a Time node into an Offset node, then into the textures UV that you want to scroll. To be able to control the direction the texture scrolls, you will need to split Time into 2 paths that then plug into a Vector 2. Adding a Multiply node for each path allows us to control the speed for each direction, and here is what that looks like.
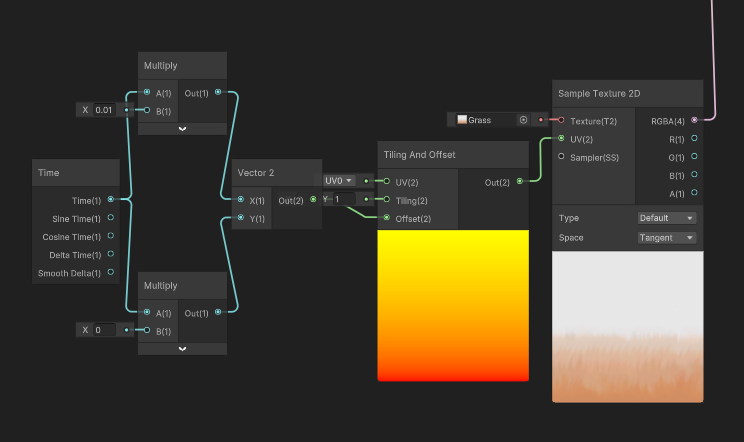
I multiplied time by 0.01 for the X, and 0 for the Y, so that way my texture scrolls from right to left slowly.
Overlapping Layers
I repeated the same process above for each of my Forest layers, making sure I set a slightly higher speed for the foreground trees. Now comes the tricky part, overlaying the layers using Shader Graph. I used a Replace Color node to achieve the over lapping layer look, but there may be a different node that can achieve the same look if not better.
In photoshop, I exported each layer with a black background. Doing this will allow me to replace the background with the other layers in Shader Graph, using the Replace Color node. Here is what that looks like.
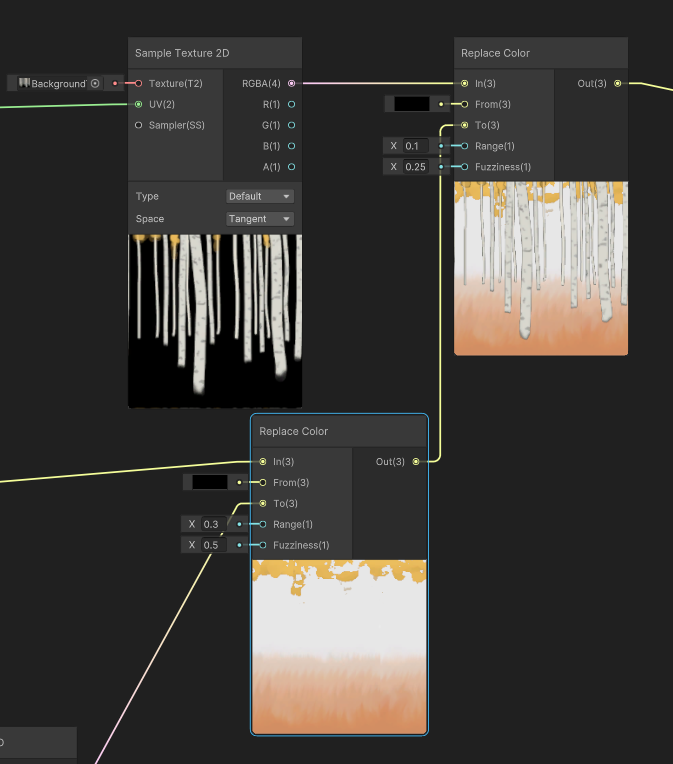
The idea behind this node is that,
- It takes in the masked-out layer.
- From will get only the color or image plugged into it (in this case it would be pure black).
- To will replace whatever is in From.
What this node is doing for us is replacing the black parts of the background forest, with the grass and leaves. This allows for the background trees to scroll at a different pace from the ground. However, this is negated because both the ground and background trees scroll at the same speed. This effect is mainly used to separate the background trees from the foreground trees, allowing the foreground trees to scroll at a different pace than the background. This is a simple effect used in 2D animation called parallax scrolling, which creates a sense of depth on a 2D plane.
Final Touches
The forest is now moving; however, it doesn't quite look like an electronic wall yet. I have made some small adjustments to make the wall read more as a Screen which I will briefly go over.
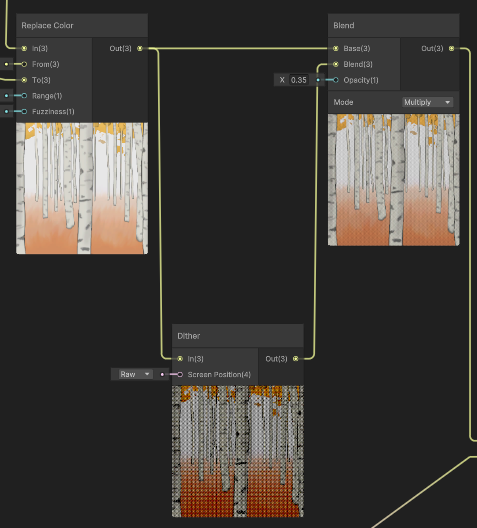
Plugging the final Forest node into a Dither node creates a very cool effect that I think replicates the look of taking a picture of a Monitor or Television screen. The effect of this node is very strong, so I used a Blend node on Multiply with an opacity of .35 to lessen the effect.
The last effect I added was a grid or pixel effect. I did this by simply creating a mask of a square, increasing the tiling of that square by a Float parameter, and Multiplying the dithered forest by the tiled squares.
Here is the final look!
The dithering effect adds some interesting banding that you may or may not want in your texture. I was unable to achieve the exact look I wanted, as I would most likely need to write my own shaders to be able to create it, but I am still satisfied with how this turned out.
Make sure to stay tuned for what's to come for R-BRT and have a great day!
Leave a comment
Log in with itch.io to leave a comment.